
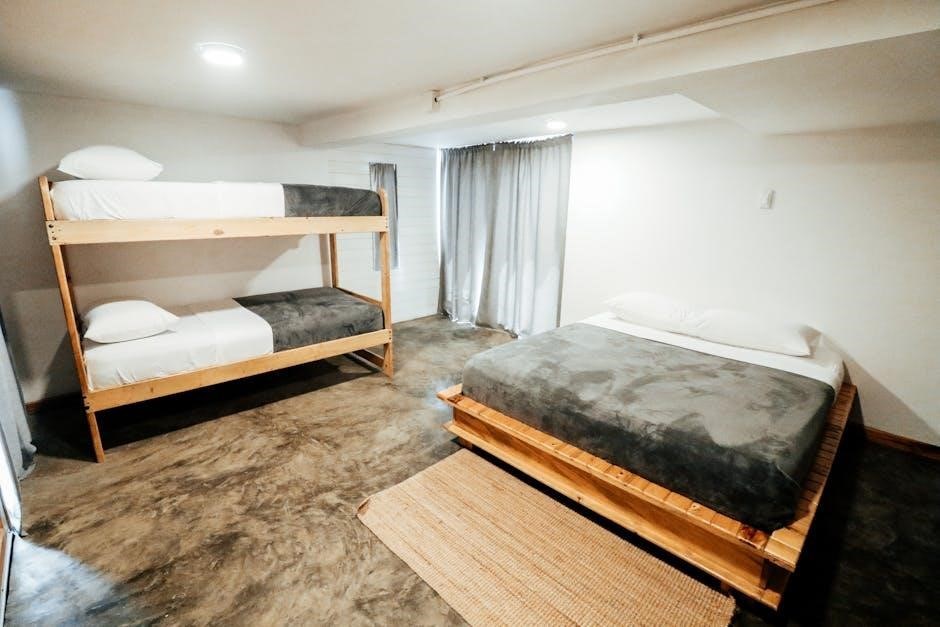
Better Homes and Gardens bunk beds offer versatile, space-saving solutions with sturdy wood construction and classic designs. Perfect for kids, they combine functionality and safety seamlessly.
Overview of the Product and Its Popularity
Better Homes and Gardens bunk beds are highly sought after for their durability, style, and versatility. These beds are designed to maximize space while offering a safe and comfortable sleeping solution for children. Their popularity stems from their classic designs, sturdy wood construction, and the option to convert them into standalone beds, making them a practical choice for growing families.
Benefits of Choosing Better Homes and Gardens Bunk Beds
Better Homes and Gardens bunk beds offer exceptional value with their easy assembly, sturdy wood construction, and timeless designs. They provide space-saving solutions while ensuring safety and comfort. The option to convert them into standalone beds adds versatility, making them a practical investment for families. Their classic and modern styles cater to various home decors, ensuring a perfect fit for any bedroom.
Understanding the Components and Tools Needed
Understanding the components and tools needed is crucial for a smooth assembly process. This includes pre-drilled holes, labeled parts, and essential hardware like bolts and screws. Tools such as Allen wrenches and screwdrivers are typically required. Organizing all items beforehand ensures efficiency and reduces assembly time.
Unpacking and Organizing the Parts
Start by carefully unpacking all components from the boxes. Organize parts by type and size to ensure everything is accounted for. Check for hardware like bolts, screws, and Allen wrenches, which are usually provided. Refer to the instruction manual to identify each piece. Labeling or grouping parts in separate bags can help streamline the assembly process and prevent misplacement.
Essential Tools Required for Assembly
Assembly requires basic tools like an Allen wrench, screwdriver, pliers, and a rubber mallet. Ensure all tools are readily available to avoid delays. Additional items like a measuring tape and clamps may be useful for precise alignment. Refer to the manual for specific tool recommendations to ensure a smooth assembly process.
Safety Precautions and Warnings
Always use recommended mattress sizes to prevent entrapment or falls. Ensure weight limits are not exceeded. Follow all warnings on labels and in instructions.
General Safety Guidelines for Assembly
Always follow safety guidelines to ensure a secure assembly process. Unpack and organize parts carefully, avoiding sharp edges. Use recommended tools and ensure all bolts are properly tightened. Never over-tighten, as this may damage the structure. Keep children away during assembly. Place the bed on a firm, even surface and adhere to weight limits specified in the instructions.
Specific Warnings for Bunk Bed Assembly
Adhere strictly to safety guidelines to prevent accidents. Use only recommended mattress sizes to avoid entrapment or falls. Do not remove warning labels from the bed. Ensure weight limits are followed. Avoid stacking beds without proper support. Always use guardrails on the upper bunk. Adult supervision is required during assembly and use. Keep loose clothing and long hair tied back to prevent entanglement.

Step-by-Step Assembly Instructions
Start by unpacking and organizing all parts. Follow the manual step-by-step, assembling the frame first, then adding supports. Ensure all bolts are securely tightened.
Preparing the Tools and Workspace
Begin by gathering all necessary tools, such as Allen wrenches, screwdrivers, and bolts. Clear a large, flat workspace and cover it with protective material. Organize parts by type and label them for easy access. Ensure good lighting and keep the area safe from distractions. Read the manual thoroughly before starting and verify all parts are accounted for. Having a helper can simplify the process.
Building the Bed Frame and Support Structures
Begin by assembling the bed frame using the provided bolts and screws. Attach the side rails and support slats to create a sturdy base. Ensure all connections are tight and aligned properly. Next, construct the lower and upper frames, securing them together with the vertical supports. Use an Allen wrench to tighten all bolts firmly, following the manual’s torque specifications. Double-check the frame’s stability before proceeding;
Attaching Railings and Guardrails
Attach railings and guardrails securely to ensure safety. Align each piece carefully and use the provided bolts to tighten them firmly. Always double-check all connections for stability.
Securing the Upper Bunk Bed Railings
Start by carefully unpacking and organizing the railings. Align the upper bunk railings with the pre-drilled holes on the bed frame. Use the provided bolts to secure them tightly. Ensure the railings are evenly spaced and properly fitted. Double-check the alignment for stability and safety. Tighten all connections firmly to prevent any movement. This step is crucial for ensuring the upper bunk’s structural integrity and safety for users.
Installing Guardrails for Safety
Attach the guardrails to the upper bunk bed using the provided screws. Ensure they fit snugly into the pre-drilled holes. Tighten securely to prevent shifting. Guardrails should be evenly spaced and aligned for maximum safety. Follow the instructions carefully to ensure proper installation. This step is essential for preventing accidental falls and ensuring the safety of the upper bunk’s occupants. Use only the recommended hardware for a secure fit.

Adding Mattresses and Final Adjustments
Place mattresses on both upper and lower bunks, ensuring they fit securely. Adjust the bed frame for stability and evenness. Tighten all connections for safety and durability. This step ensures comfort and proper support for users, completing the assembly process effectively.
Placing Mattresses on the Bunk Bed
Start by carefully placing the mattresses on the upper and lower bunks, ensuring they fit snugly and are centered. Use the recommended mattress size to prevent overhang and ensure safety; Check that the mattresses align with the bed frame’s edges and adhere to the manufacturer’s guidelines for proper fit and support. This step ensures comfort and stability for users while maintaining the bed’s structural integrity and safety standards.
Tightening All Bolts and Screws
Once the bed frame and mattresses are in place, thoroughly tighten all bolts and screws using the provided Allen wrench. Start from the bottom and work your way up to ensure stability. Double-check all connections to guarantee they are secure. This step is critical for preventing wobbling or instability, ensuring the bunk bed remains safe and sturdy for years of use.
Using Online Resources and Videos
Utilize official assembly videos and manuals from Better Homes and Gardens for guidance. Videos on platforms like Vimeo and Walmart’s website provide step-by-step instructions, ensuring a smooth assembly process.
How to Utilize Assembly Videos Effectively
Watch assembly videos carefully, pausing as needed to follow each step. Ensure your workspace matches the setup shown. Follow the video’s pacing and refer to your manual for clarity. Use the video to verify part identification and tool usage. Check for updates or additional tips in the video descriptions to ensure accuracy and safety during assembly.
Accessing Official Assembly Manuals
Access official assembly manuals for Better Homes and Gardens bunk beds through the product packaging or the manufacturer’s website. Models like the Leighton Wood Bunk Bed often include detailed PDF guides. Visit Walmart’s official site or Dorel Home Furniture’s resources for specific instructions. Ensure to download the correct manual for your model to avoid confusion during assembly.
Tips for a Successful Assembly
Organize all parts before starting, follow instructions carefully, and use the right tools. Working with a helper can simplify the process and ensure accuracy.
Organizing Parts Before Starting
Unpack and organize all components by type and size. Separate hardware like bolts, screws, and Allen wrenches. Label parts according to the assembly manual for easy identification. Ensure all tools, such as screwdrivers and wrenches, are within reach. This step prevents delays and ensures a smooth assembly process without confusion or missing pieces.
Following Instructions Carefully
Following instructions carefully ensures a safe and successful assembly process. Read the manual thoroughly, understanding each step before proceeding. Pay attention to safety warnings and recommended tools to avoid errors. Use online resources like assembly videos for clarification. Double-check each part’s placement to ensure stability and prevent potential hazards. Proper adherence guarantees a sturdy and secure bunk bed.

Customization and Versatility
Better Homes and Gardens bunk beds offer versatility, as they can be converted into standalone twin beds, providing flexible solutions for growing families and varying needs.

Optional Customization Ideas
Better Homes and Gardens bunk beds can be personalized with paint, decals, or themed bedding. Adding storage drawers or shelves enhances functionality. Converting them into standalone beds offers flexibility. Incorporating lighting, such as under-bed LEDs, adds ambiance. These ideas make the bunk beds unique and adapt to any bedroom style, ensuring a custom fit for your space and preferences while maintaining safety and durability.
Converting Bunk Beds into Standalone Beds
Better Homes and Gardens bunk beds can be easily converted into standalone twin beds by disassembling the stacked structure. Remove the connecting bolts and separate the upper and lower units. Attach the provided legs to each section for stability. This versatility allows each bed to function independently, making them ideal for different room layouts or sharing between siblings. Ensure all safety guidelines are followed during conversion to maintain structural integrity and prevent any instability.

Maintenance and Upkeep
Regularly clean the bunk bed with a damp cloth and inspect for wear. Tighten bolts and screws periodically to ensure stability. Protect the finish from spills and scratches for long-lasting durability.
Cleaning and Caring for the Bunk Bed
Use a soft, damp cloth to wipe down surfaces regularly. Avoid harsh chemicals or abrasive cleaners that may damage the finish. Inspect for wear and tear, and tighten loose screws. Clean mattresses with a mild detergent and allow them to dry completely. Protect wood finishes from spills and humidity to maintain durability and appearance over time.
Regular Inspections for Stability
Perform regular inspections every 2-3 months to ensure the bunk bed remains stable and secure. Check all connections, bolts, and screws for tightness. Inspect wood and metal components for signs of wear or damage. Address any wobbling by tightening loose parts. Ensure guardrails are firmly attached and mattresses are properly fitted to maintain safety and prevent potential hazards over time.
Troubleshooting Common Issues
Addressing assembly errors promptly ensures stability and safety. Check for loose bolts or screws, tighten them firmly. Inspect for misaligned parts and correct them. If the bed wobbles, verify all connections are secure and level. Consult the manual or online resources for guidance on resolving specific issues effectively to maintain the bunk bed’s structural integrity and prevent potential hazards.
Identifying and Fixing Assembly Errors
Start by reviewing the assembly steps to identify where errors may have occurred. Check for loose bolts or screws and tighten them securely. Ensure all parts are correctly aligned and properly fitted. If a piece doesn’t fit, verify it’s the right component for that step. Refer to the manual or online videos for clarity. Addressing issues early prevents instability and ensures the bunk bed’s safety and durability.
Addressing Wobbling or Instability
If the bunk bed wobbles, check for loose connections and tighten all bolts and screws. Ensure the bed is placed on a level surface and verify that all support structures are properly assembled. If instability persists, refer to the manual or online assembly videos for guidance. Addressing these issues ensures the bed remains stable and safe for use.
Completing the assembly successfully ensures a safe and functional bunk bed for years to come. Enjoy the satisfaction of a sturdy, well-built space-saving solution for your home.
Final Thoughts on Assembly and Usage
Successfully assembling your Better Homes and Gardens bunk bed provides a durable, stylish, and safe sleeping solution. With proper care, it will remain a versatile and functional addition to any bedroom, offering years of comfort and convenience for your family;
Enjoying Your New Bunk Bed
Your new Better Homes and Gardens bunk bed transforms any room into a cozy retreat, offering versatile sleeping solutions with a classic, timeless appeal. Its sturdy construction ensures safety and durability, while its stylish design enhances the room’s decor. Kids will love climbing up and down, experiencing the fun of bunk bed living. A perfect blend of functionality and charm, it adapts to your family’s needs for years to come.